
Prepare a model in Blender
The steps in Blender that make a jewellery file ready for iJewel3D, with the material names in the place of layers.
Blender has no layers. The platform reads the name of each material instead. The rules behind the steps are on the 3D model guidelines page.
Before you start
- You have Blender 3.6 or later.
- The model is in Blender. Blender does not open a 3DM file. Import an OBJ, FBX or GLB file, or open the 3DM file in Rhino and export it as GLB.
Set the units
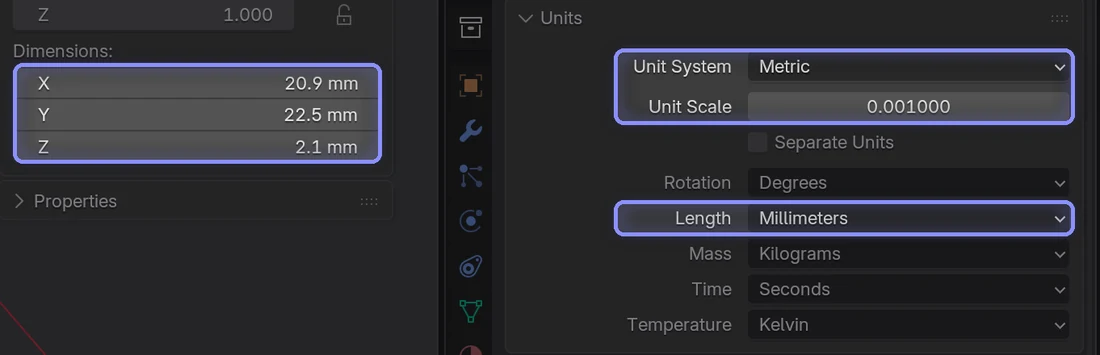
- Open Scene Properties, then Units.
- Set Unit System to Metric.
- Set Unit Scale to
0.001. - Set Length to Millimeters.
- Measure the ring across its width. A ring is 15 mm to 25 mm across. If the size is wrong, scale the model, then apply the scale with Ctrl+A, Scale.
All 5 steps are done.
Make the materials
- Make one material for each metal tone. Name them
Metal 01andMetal 02. - Make one material for each gem cut. Name them
Gem 01,Gem 02and so on. - Give each object one material. An object with two materials gets two parts on the platform.
- Give the prongs a metal material. Give the gem materials only to stones.
- Delete the unused materials. Blender exports only the materials that an object uses.
All 5 steps are done.
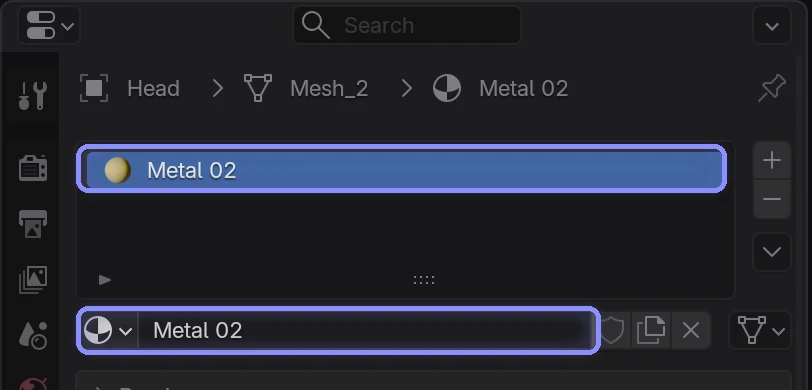
The colour and the shader of the material do not matter. The platform replaces them with its own materials. The name matters.
Collections
A collection does not become a material or a layer. Use collections for your own order in the file.
Make the stones render-ready
- Keep each stone as a separate object. Do not join the stones with Ctrl+J.
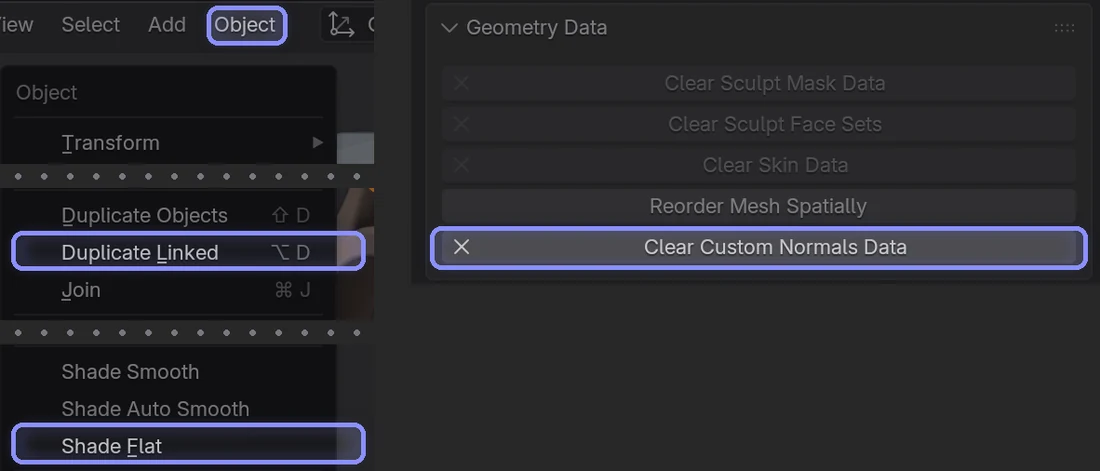
- Select all the stones, then select Object, Shade Flat. The facets are now flat.
- On each stone, open Object Data Properties, then Geometry Data. If Clear Custom Normals Data shows, select it. Older versions call it Clear Custom Split Normals Data. Custom normals keep the stone smooth after Shade Flat.
- Remove the Smooth by Angle and Mirror modifiers from the stones. Rotate a copy instead of a mirror.
- Count the faces of one stone with the Statistics overlay. A stone has less than 1,500 faces.
- Make sure that the normals of each stone point outwards. In Edit Mode, select all, then select Mesh, Normals, Recalculate Outside.
All 6 steps are done.
Make the identical stones share one mesh
A linked duplicate uses the same mesh data as the original. The GLB file then holds one geometry, and the renderer bakes one refraction map.
- Keep one stone of each cut.
- Select the stone, then press Alt+D (⌥D on a Mac) to make a linked duplicate. Do not use Shift+D: that makes a copy of the mesh data.
- Move, rotate and scale each duplicate. The object transform holds the carat size and the orientation.
- For stones that are already in place as copies, select them all, select the master stone last, then select Object, Link/Transfer Data, Link Object Data.
All 4 steps are done.
Join the metal
- Select the metal objects of one material.
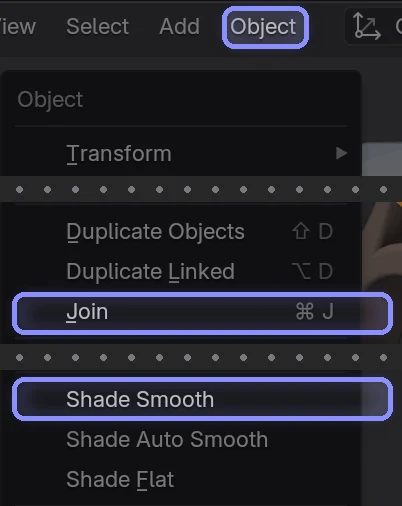
- Press Ctrl+J (⌘J on a Mac), or select Object, Join. The parts become one object.
- Select Object, Shade Smooth, or Shade Auto Smooth in Blender 4.1 or later.
- Repeat for each metal material.
All 4 steps are done.
Reduce a heavy model
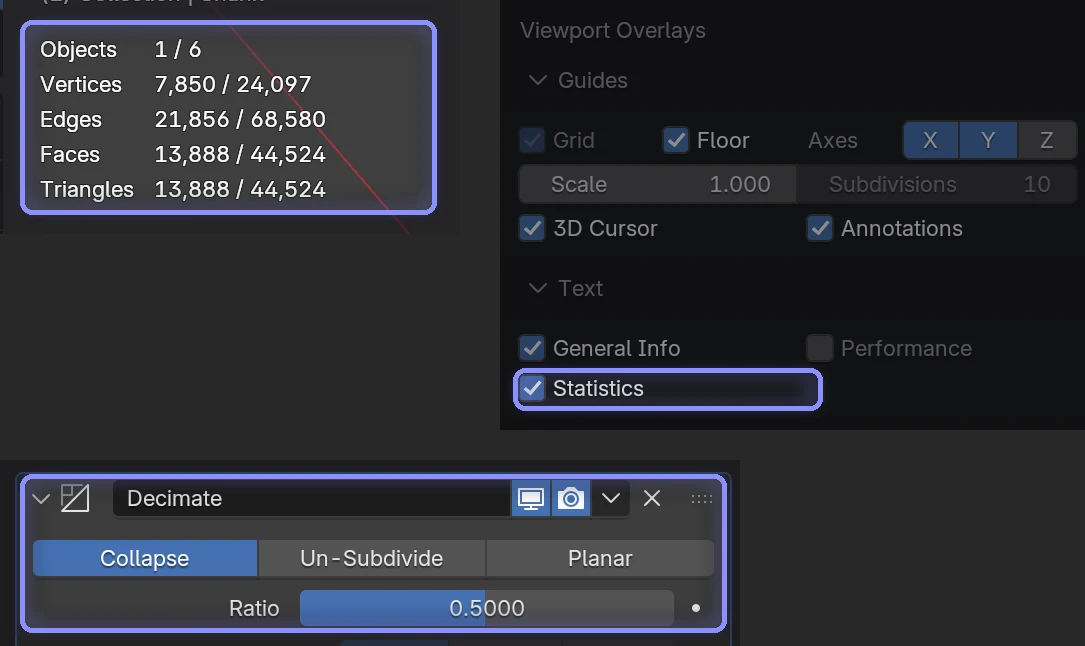
- Turn on the Statistics overlay. The model has less than 200,000 triangles.
- If the model is heavier, add a Decimate modifier to the heavy metal parts, and apply it.
- Delete the objects that are not part of the piece: curves, empties, cameras and lights.
All 3 steps are done.
Export the file
- Select File, Export, glTF 2.0 (.glb/.gltf).
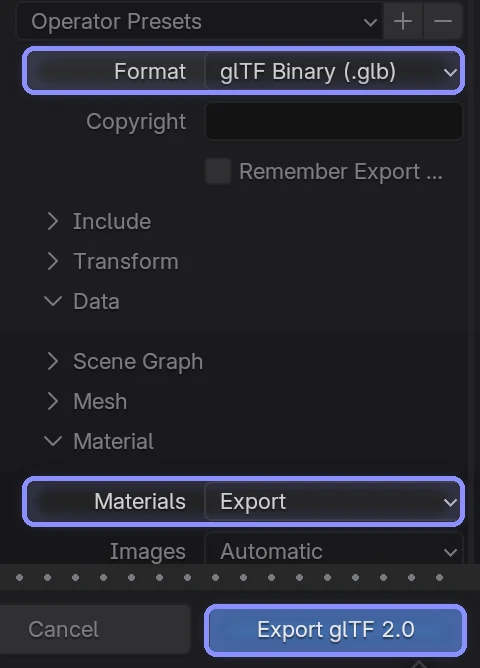
- Set Format to glTF Binary (.glb).
- Under Include, keep Selected Objects off, so that the whole model exports.
- Under Transform, keep +Y Up on.
- Under Data, Mesh, keep Apply Modifiers and Normals on.
- Under Data, Material, set Materials to Export.
- Select Export glTF 2.0.
All 7 steps are done.
Compression
You can keep Compression off in Blender. The platform compresses the file when you upload it.
Animations
The platform plays glTF animations. For a camera animation from Blender, export the camera as a separate GLB file, then drop both files in Playground. Refer to glTF animation.
Video
Name the materials in Blender.