
Batch Renderer
The Batch Renderer (Beta) tab in iJewel Playground renders many camera views of one model in one run. For each view, it makes an image, a 360° video, or both. It can also repeat the run for each material combination of the model. It runs in your browser, and it saves the files in a folder on your computer.
Batch Renderer or BatchX?
iJewel3D has two tools with similar names. The Batch Renderer is a tab inside iJewel Playground, in the browser. It is not BatchX, the desktop app.
| Batch Renderer (this page) | BatchX | |
|---|---|---|
| What it is | A tab in iJewel Playground, in the browser | An app for Windows and macOS that you download |
| Models in one run | The one model that is open in Playground | All the 3D files in a folder |
| Access | A Premium plan or higher | A BatchX licence for each device |
| Use it when | You need all views and materials of one model | You need renders of a full collection |
Before you start
| You need | Detail |
|---|---|
| An account | Log in. Without a login, the tab shows Please login to access this feature. |
| A plan | Premium or higher: Premium, Startup, Professional, and the organization plans Silver, Gold and Platinum. See Plans and limits. |
| A browser | Chrome or Edge on a computer. The export saves the files in a folder that you select, and Firefox and Safari cannot do this. |
| A model | The scene must contain a model. If the scene is empty, the tab shows Scene is empty. Please load a model to initialize BatchX. |
On the Free plan, you can open the tab and initialize the camera views. The export area is greyed out: the Export button, the camera views and the settings. The tab shows Upgrade your plan to keep using this feature. and an upgrade button.
Step 1: Open the Batch Renderer tab
- Open your model in iJewel Playground.
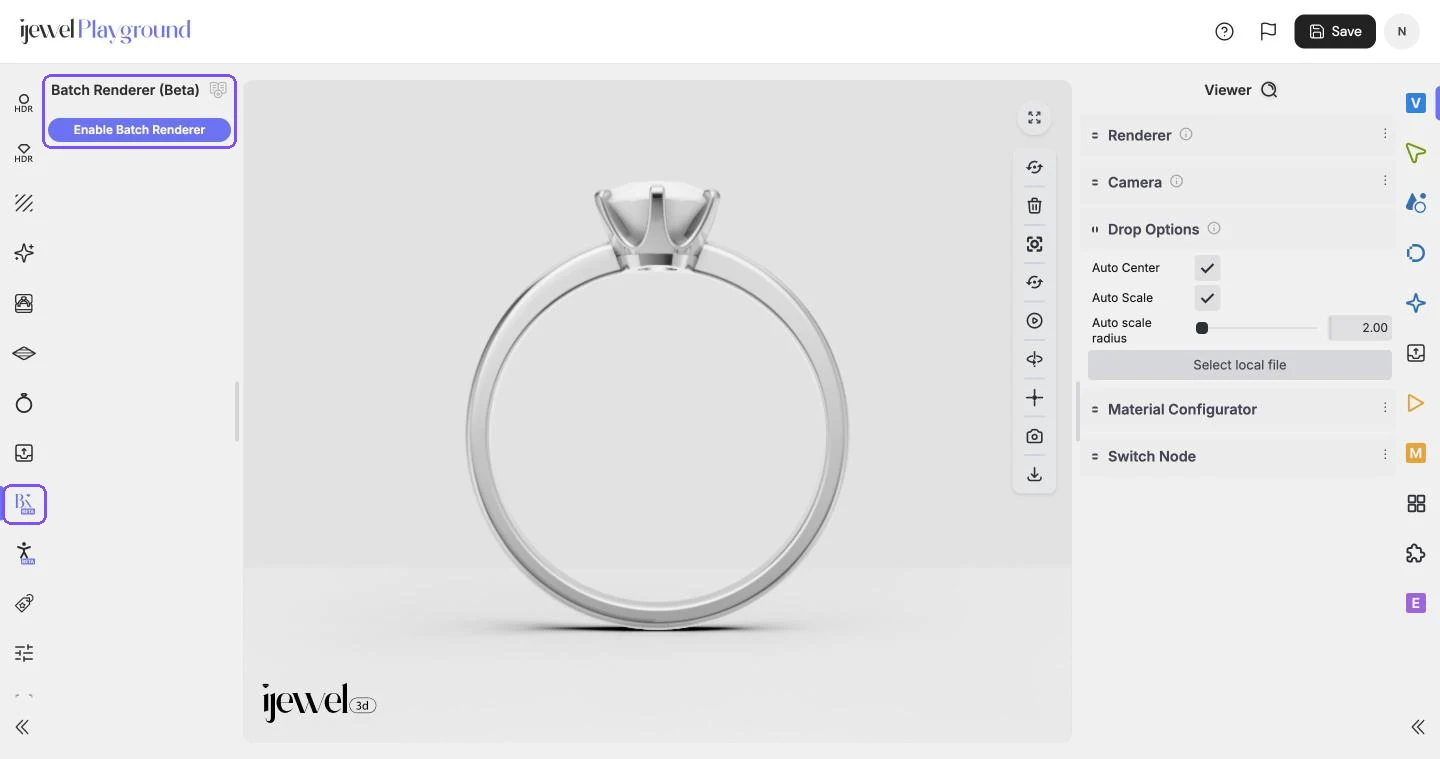
- In the left bar, click the Batch Renderer icon. The panel shows Batch Renderer (Beta).
TIP
Click the video icon next to the title Batch Renderer (Beta) to watch a short video about the tab.
Step 2: Enable the Batch Renderer
The Batch Renderer is off when Playground opens. To turn it on, the page loads again.
- Save your project. The reload removes changes that you did not save.
- Click Enable Batch Renderer.
- Read the message. To skip this message the next time, select Remember my choice. The browser keeps this choice.
- Click Confirm.
All 4 steps are done.
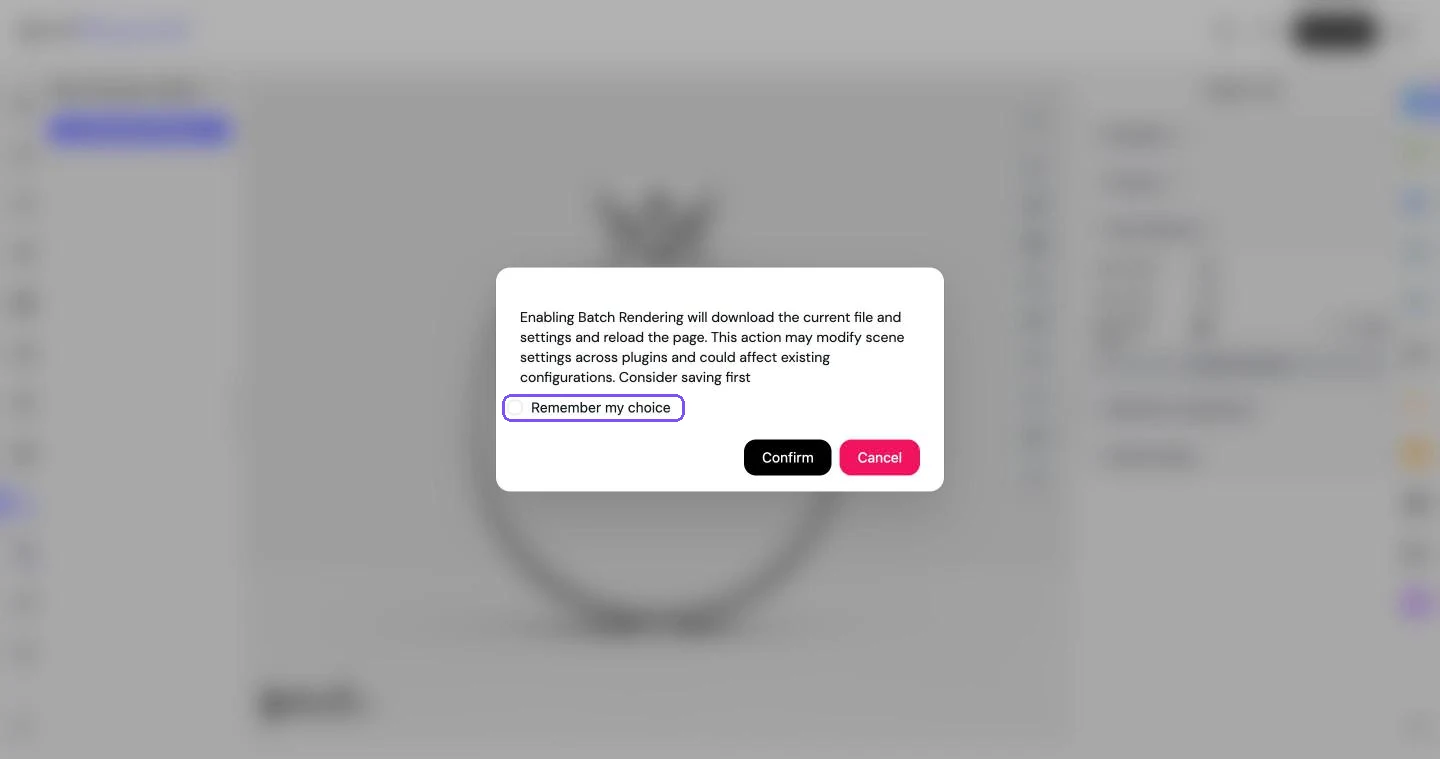
If the message says that the current file will be downloaded, the browser first saves a copy of the model as a .glb file. Then the page loads again, and batchX=true is added to the address of the page. While batchX=true stays in the address, Playground opens with the Batch Renderer on.
- A model from your files opens again after the reload. Changes that you did not save are lost.
- A model that you did not save is not in the scene after the reload. Drop the downloaded
.glbfile on the page to load it again.
TIP
To open Playground with the Batch Renderer on each time, bookmark the address that contains batchX=true. To go back to the normal editor, open the model from its normal link. See Playground is stuck in batch render mode.
Step 3: Initialize the camera views
- Click Initialize.
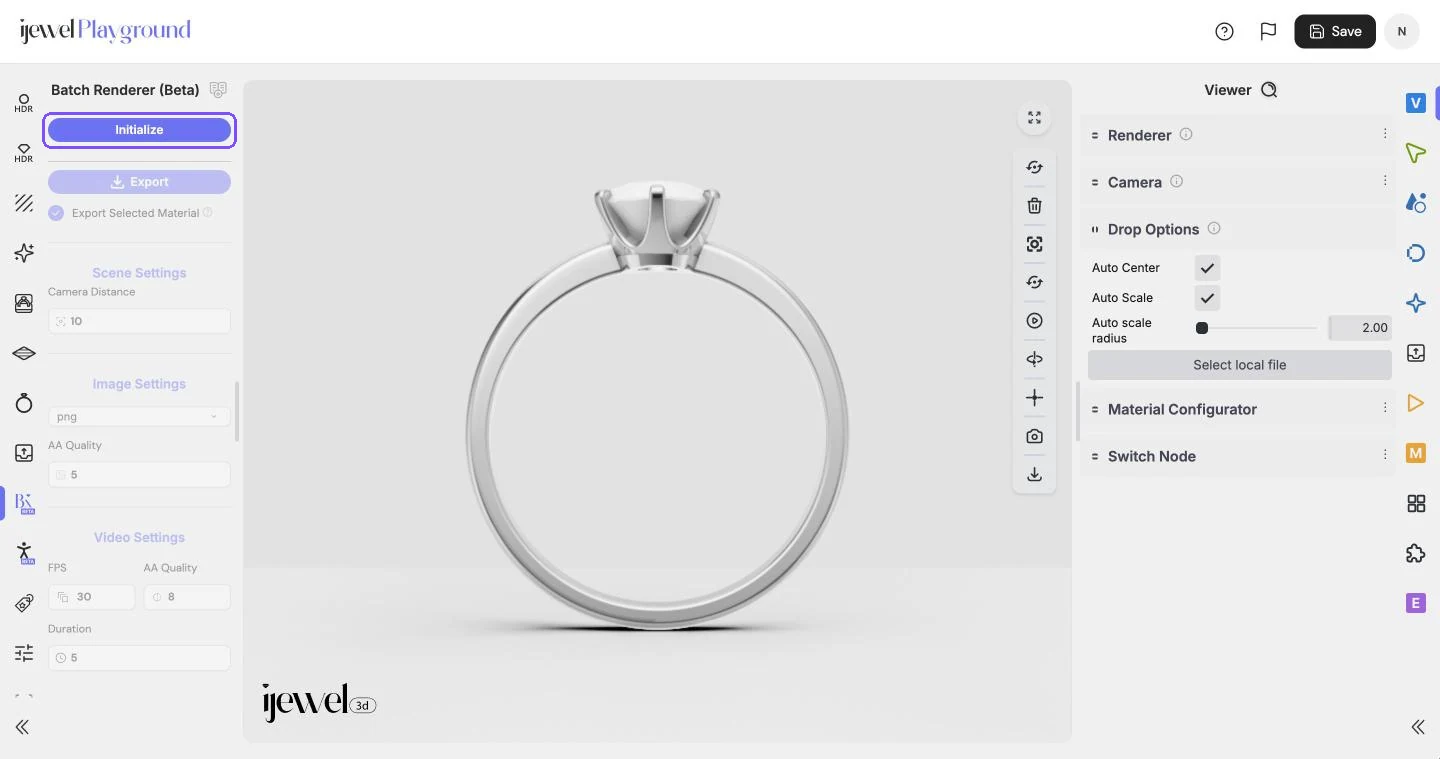
The Batch Renderer makes five camera views, each with a thumbnail:
| View | Camera position |
|---|---|
| Front | In front of the model |
| Top | Directly above the model |
| Side | At the side of the model |
| Perspective | Diagonal, above the model |
| Ground | The model in its ground pose |
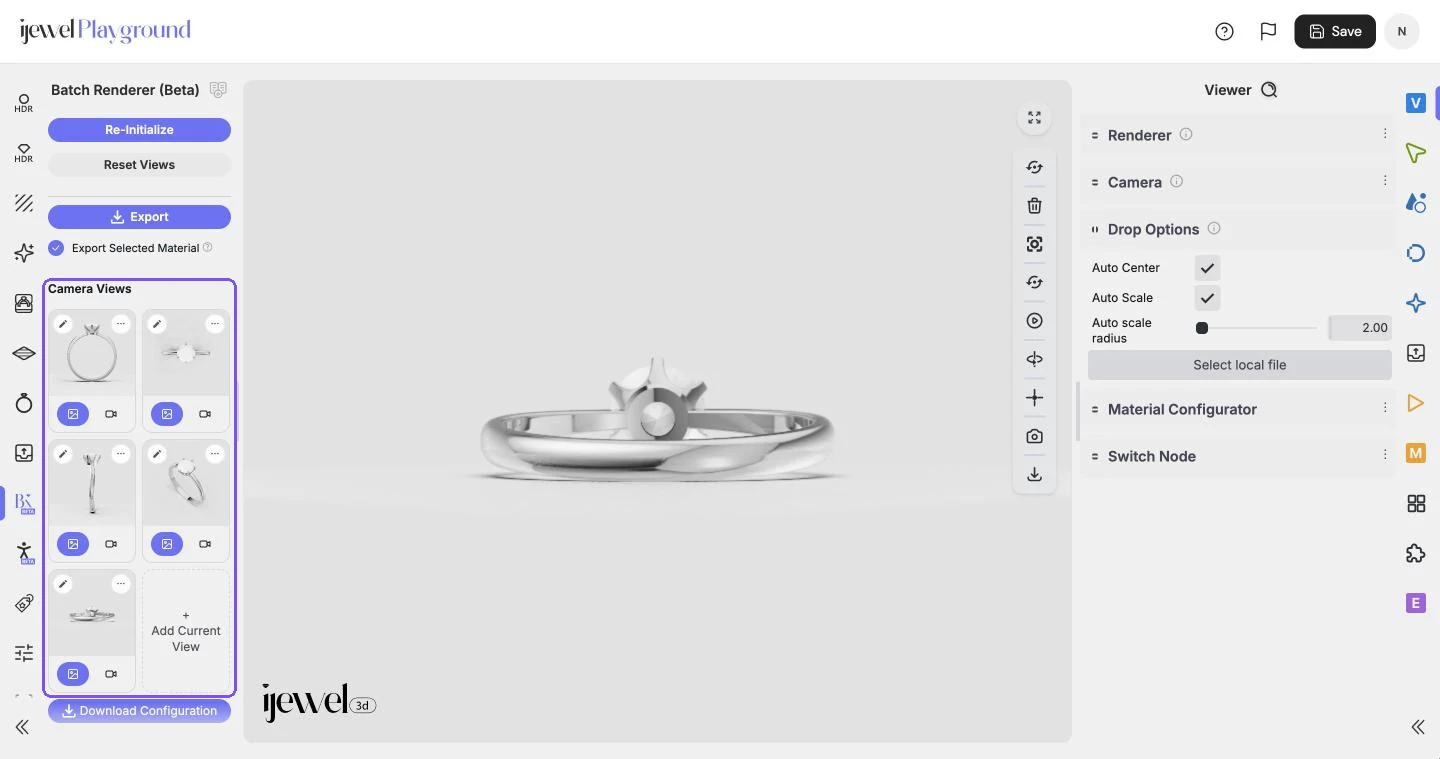
Each view is a card. Click a card to move the camera to that view. Point at a card to see the name of the view.
Step 4: Set up each camera view
Picture and video
The two buttons at the bottom of a card set what the run makes from that view. A filled button is on.
| Button | When it is on |
|---|---|
| Export Picture (picture icon) | The run makes one image of the view. |
| Export Video (video icon) | The run makes one 360° video of the view. |
On a new view, Export Picture is on and Export Video is off. You can turn on both. If both are off, the run skips the view.
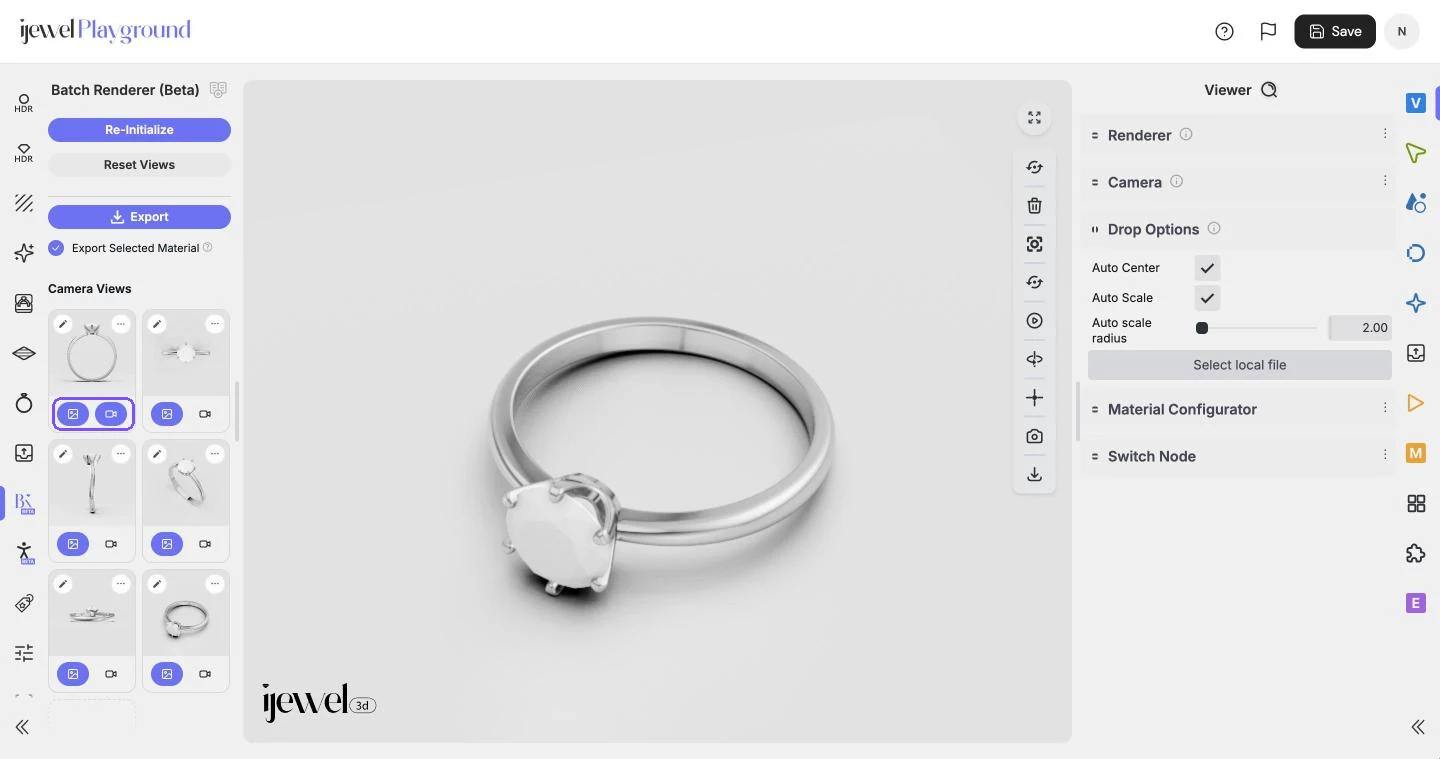
A 360° video makes one full turn around the model, from the camera view. For the Top view, the model turns below the camera, and the ground and its shadow turn with it.
Rename a view
The name of a view is the start of the name of its files.
- Click the pencil icon at the top left of the card.
- Type the new name.
- Press
Enteror click the check mark. To cancel, pressEscor click the cross.
All 3 steps are done.
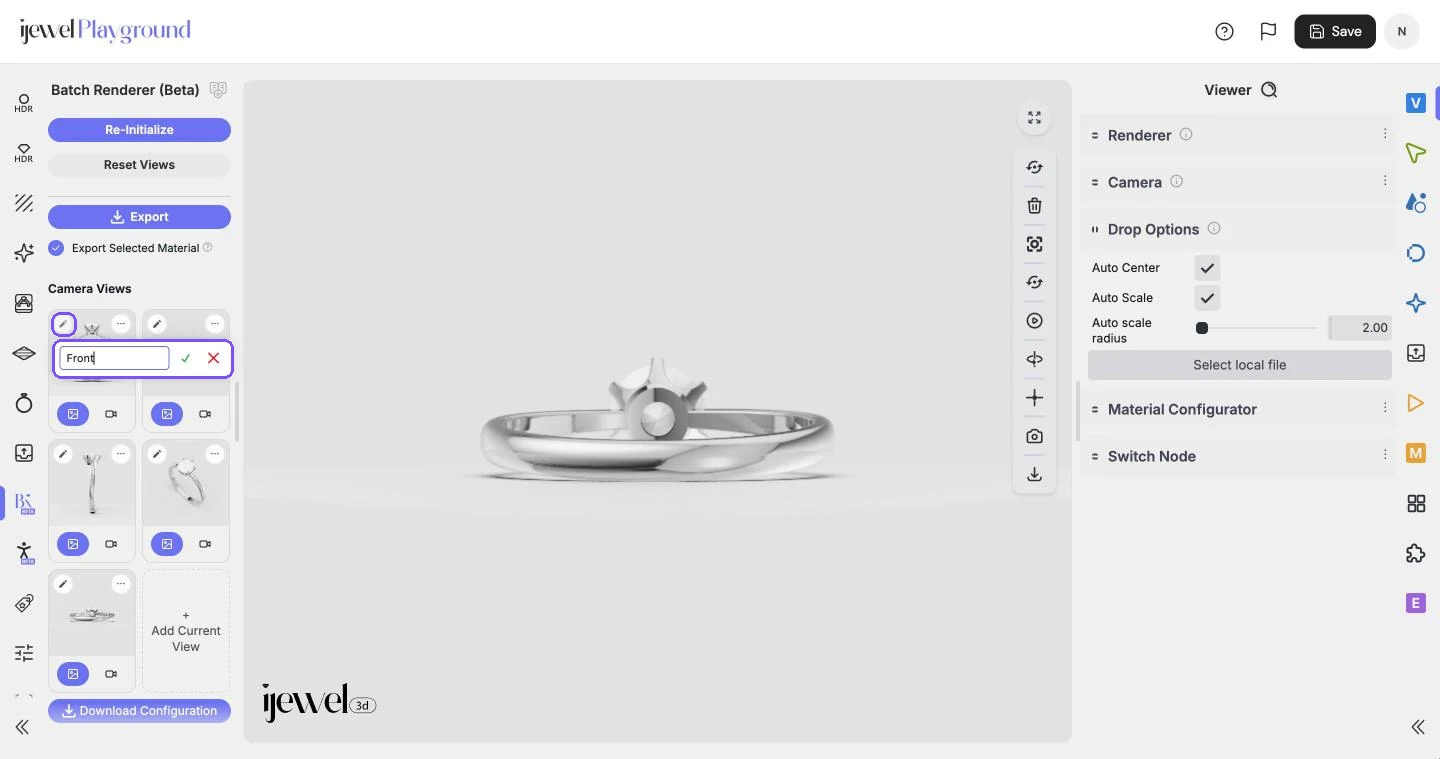
Give each view a different name.
Update or remove a view
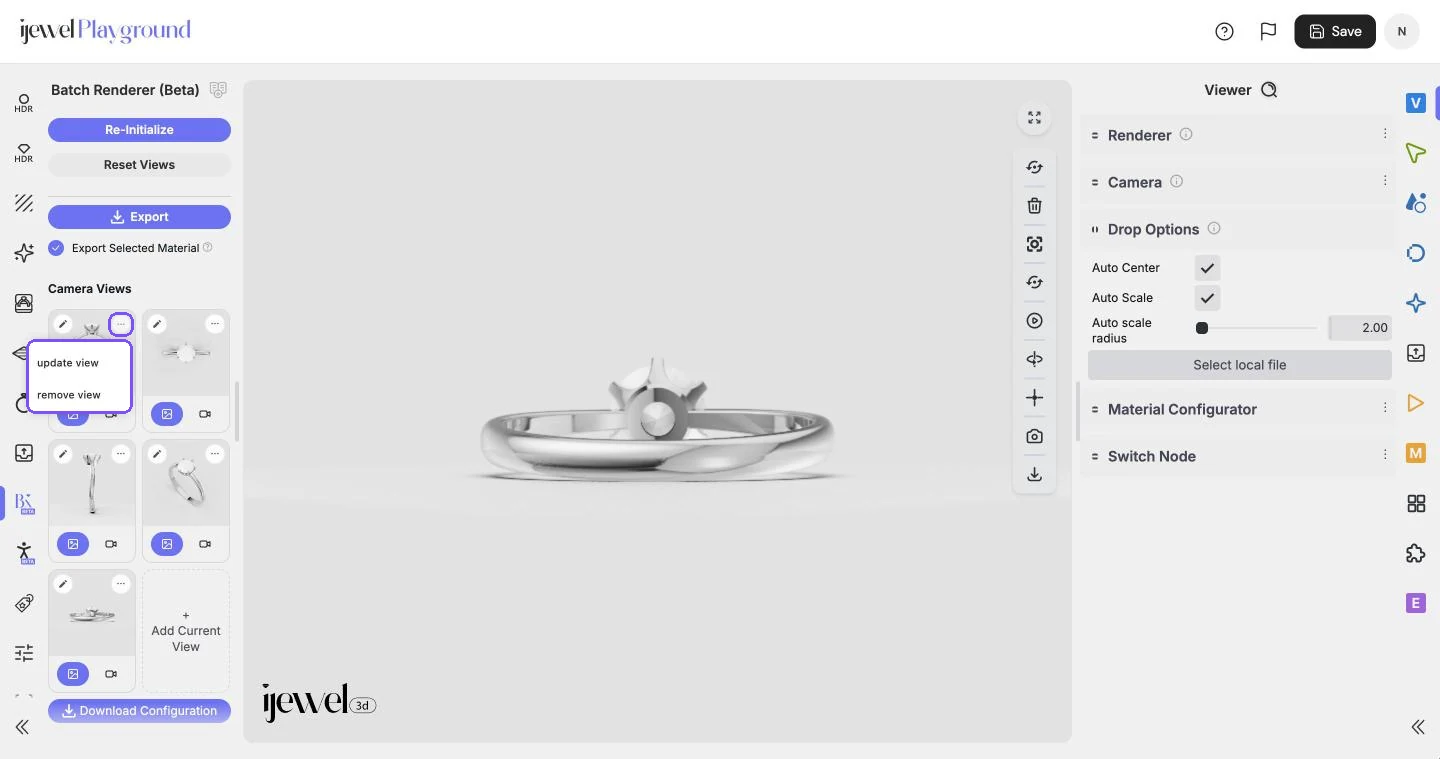
Click the ··· icon at the top right of the card:
| Option | What it does |
|---|---|
| update view | Saves the current camera of the canvas into this view. The thumbnail changes. |
| remove view | Removes the view from the list. |
Step 5: Add, reset or re-initialize views
| Control | What it does |
|---|---|
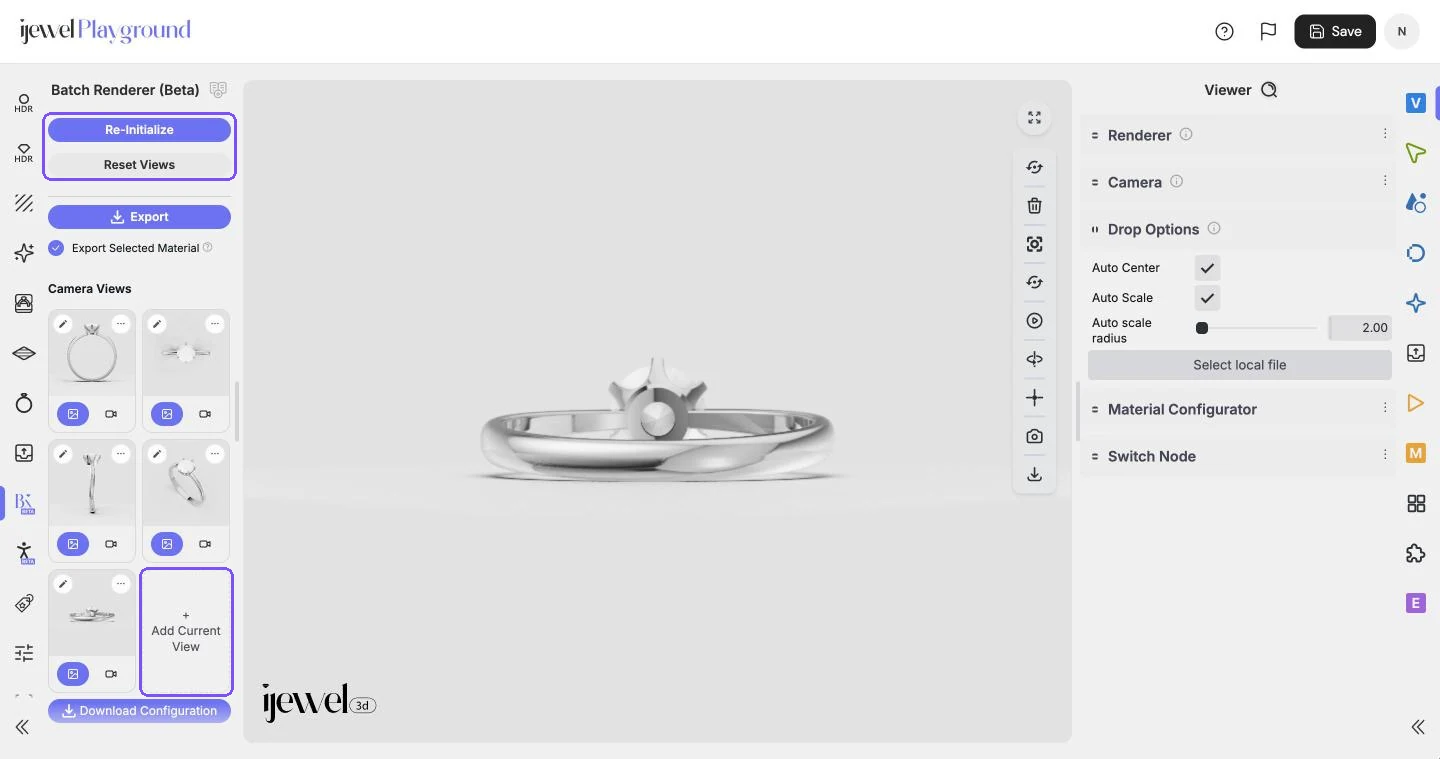
| Add Current View | Adds the current camera of the canvas as a new view. The new view gets a name such as #view9. Rename it to give its files a clear name. |
| Reset Views | Removes all views, also the views that you added, and makes the five default views again. |
| Re-Initialize | Puts the views back to how they were when you initialized them. The changes since then are lost. |
Reset Views and Re-Initialize ask you to confirm first.
Step 6: Choose the settings
The settings are below the camera views. Scroll down the panel to see them.
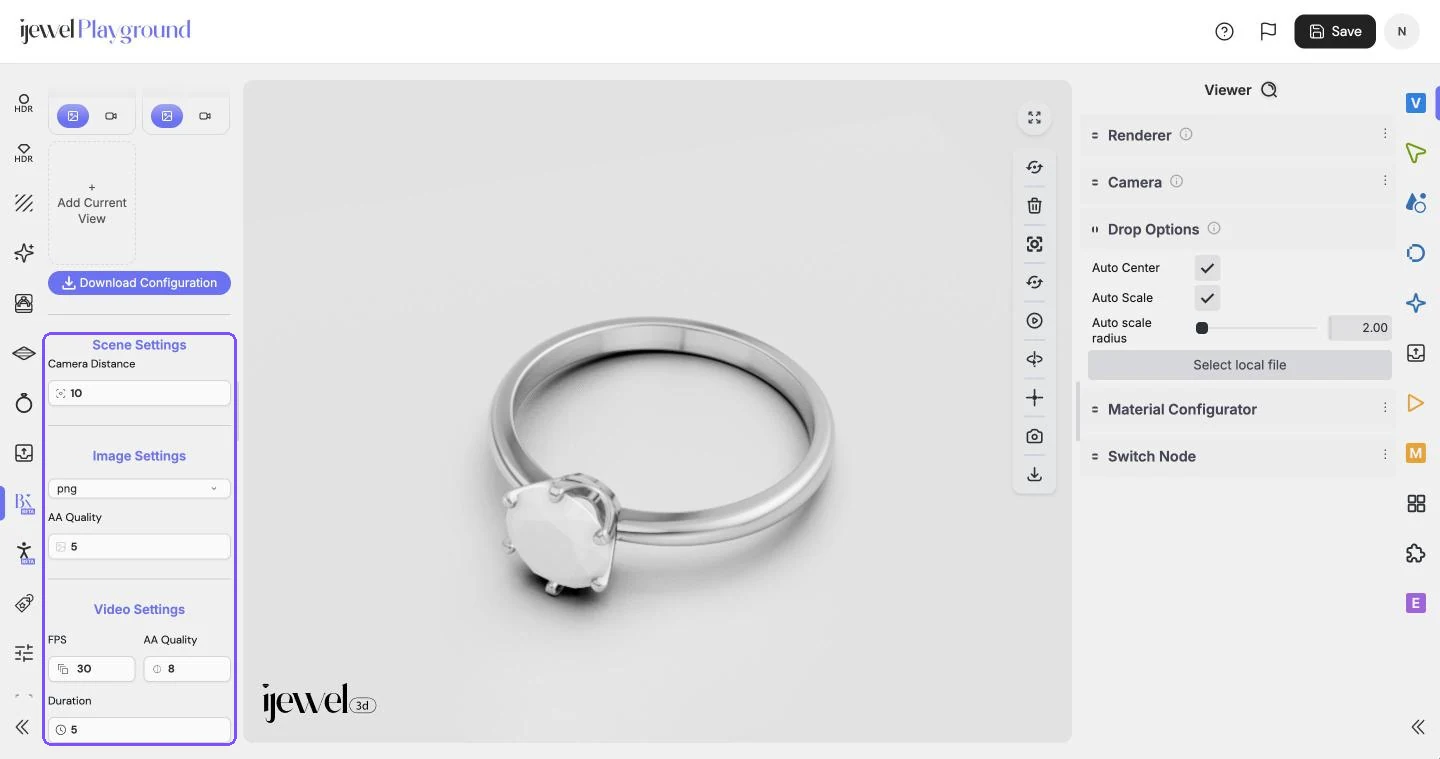
Scene Settings
| Setting | Default | Range | What it does |
|---|---|---|---|
| Camera Distance | 10 | 1 to 50 | The distance from the camera to the center of the model, for the five default views. It does not change the views that you added. |
Image Settings
| Setting | Default | Range | What it does |
|---|---|---|---|
| Format | png | png, jpeg, webp | The file format of the images. Playground keeps your choice for the next time. |
| AA Quality | 5 | 1 to 32 | The anti-aliasing quality of each image. A higher value gives smoother edges and a longer render. |
Video Settings
| Setting | Default | Range | What it does |
|---|---|---|---|
| FPS | 30 | 10 to 60 | The frames in each second of video. |
| AA Quality | 8 | 1 to 32 | The anti-aliasing quality of each video frame. |
| Duration | 5 | 3 to 30 | The length of each video in seconds. |
- The videos are MP4 files.
- The images and videos have the size of the canvas. To set an exact size, see Renderer Settings.
- A value outside the range renders at the nearest value in the range.
- If a field shows an error, for example Value must be at most 64, correct the value. Until you do, the Export button stays off.
Step 7: Choose the materials
The Export Selected Material checkbox is below the Export button. It is selected each time you open the tab.
| Export Selected Material | What the run renders |
|---|---|
| Selected | Each view one time, with the current metal and stone only. |
| Cleared | Each view one time for each material combination of the Material Configurator. |
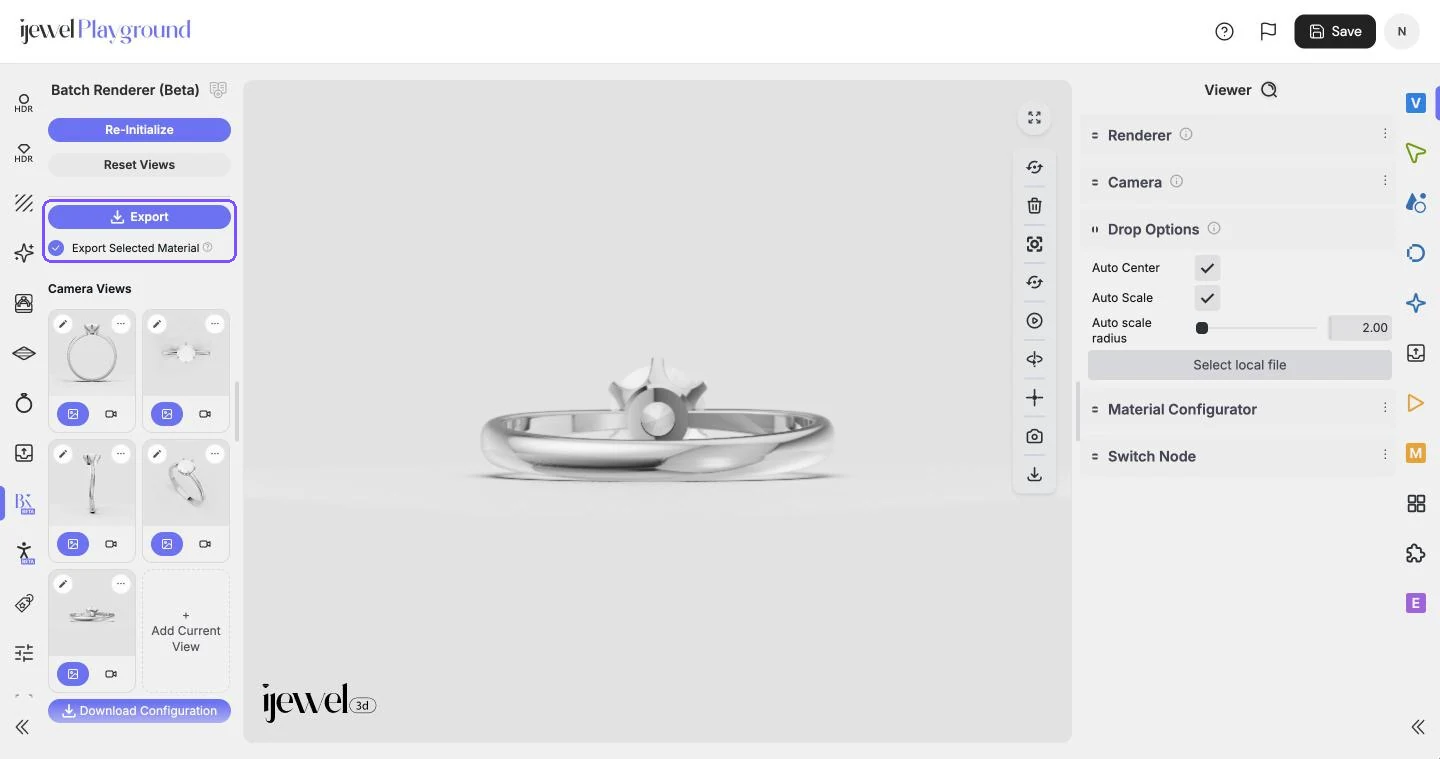
The number of combinations is the number of options in each variation, multiplied together. For example, 3 metals and 2 stones give 6 combinations. With 5 views that make images, the run then makes 30 images.
Step 8: Export
- Click Export.
- The browser asks for a folder. Select a folder on your computer.
- If the browser asks for permission to save files in the folder, allow it.
All 3 steps are done.
The run starts. The Export button shows the progress, for example Processing: 2 / 7. The total counts each image and each video.
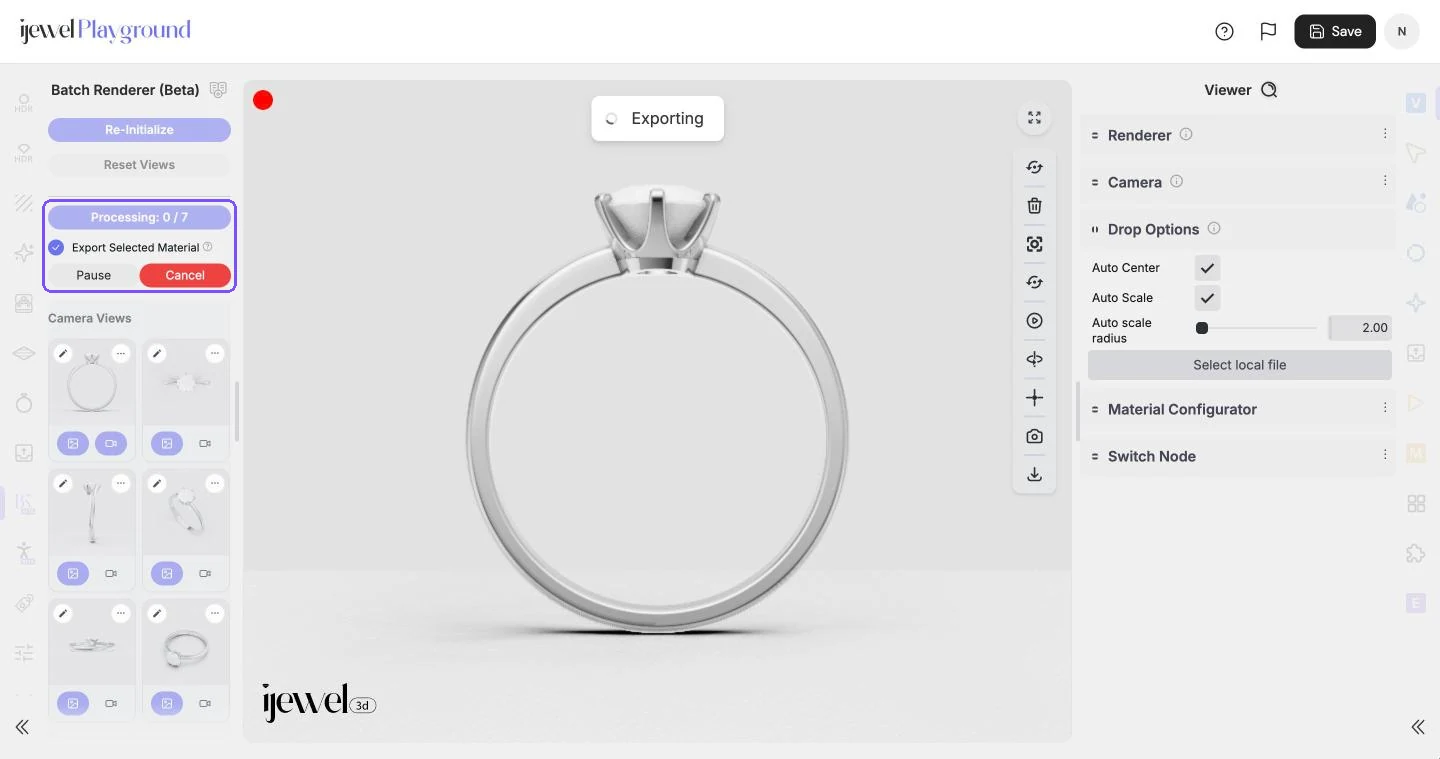
| Button | What it does |
|---|---|
| Pause | Stops the run after the view that it renders now. The progress shows Paused, and the button changes to Resume. |
| Resume | Continues the run. |
| Cancel | Stops the run. The files that are already saved stay in the folder. |
At the end of the run, Playground shows Export completed.
TIP
If Playground shows No combination selected, no view has Export Picture or Export Video on. Turn on one of them for a minimum of one view.
Keep the tab open and in front
WARNING
Keep the Playground tab open and in front until Export completed shows. Do not switch to another tab or minimize the window. The render stops while the tab is in the background. If you close the tab, the run stops.
The output folder and file names
Each run makes a new subfolder in the folder that you selected. The name is i- and a number, for example i-1794809891689. Each file goes into this subfolder when its render is complete.
| Export Selected Material | File name | Example |
|---|---|---|
| Selected | <view name>.<format> | Front.png, Front.mp4 |
| Cleared | <view name>_<material 1>_<material 2>.<format> | Front_Yellow Gold_Round Diamond.png |
- The view name is the name on the card. When you rename a view, its file names change.
- The material names come in the sequence of the variations in the Material Configurator.
- The format is
png,jpegorwebpfor an image, andmp4for a video. - These characters become
_in a file name:/ \ ? % * : | " < > , ; = #. A view named#view9makes the file_view9.png. - If the subfolder already has a file with the same name, the new file gets a random ending.
Use the same views on another model
Download Configuration saves the camera views in a file, batchx-configuration.json: their positions, names and the picture and video buttons.
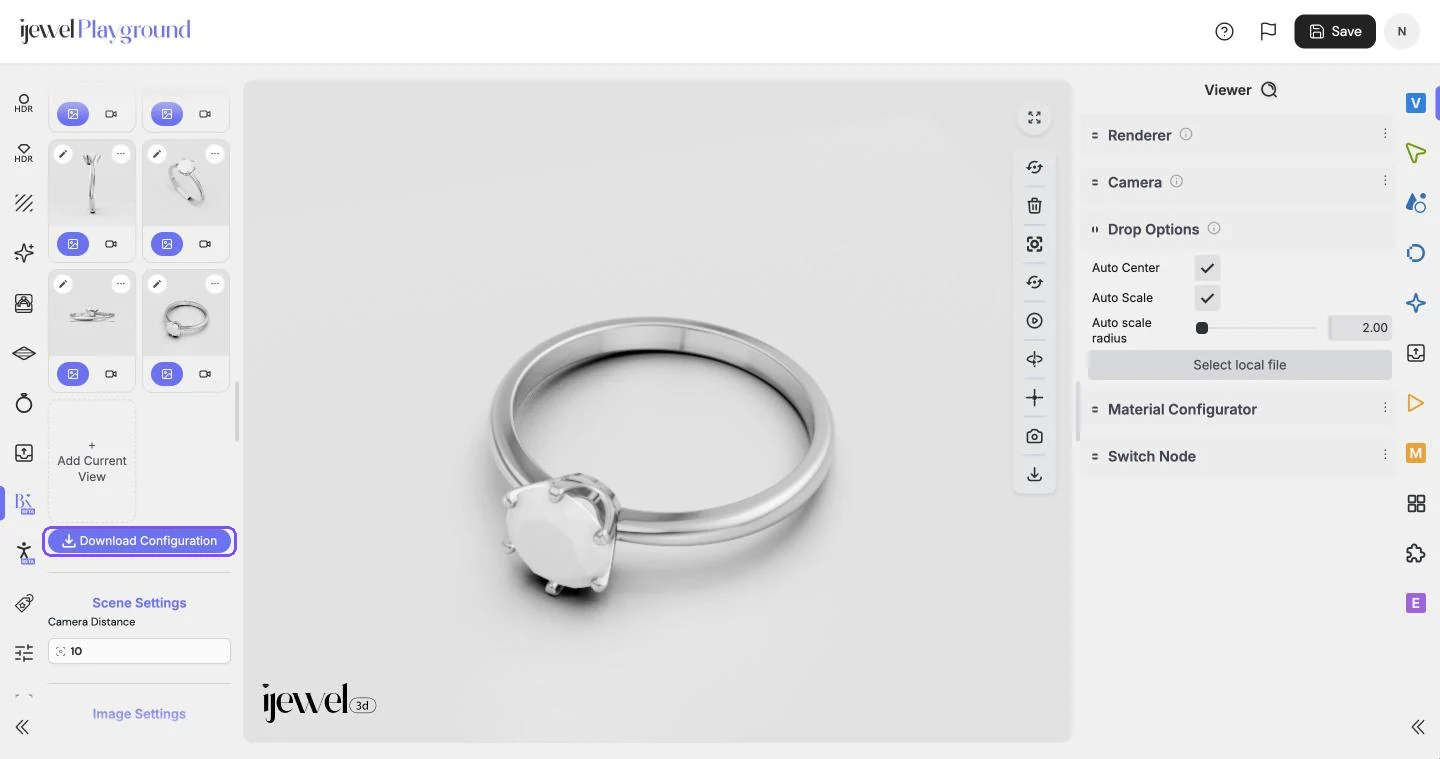
- Click Download Configuration.
- Open the next model in Playground. Enable the Batch Renderer and click Initialize.
- Drop
batchx-configuration.jsonon the canvas. - Playground asks Do you want to clear current BatchX configuration and load the new one? Click Yes.
All 4 steps are done.
The views of the file replace the current views. The views match when each model has the same position and orientation.
Related pages
- Export Images and Export Videos: one image or one video at a time.
- Material Configurator: the material variations that the Batch Renderer combines.
- Playground is stuck in batch render mode
- BatchX: the desktop app that renders many 3D files.