
Engraving
Put a text or a logo on a metal part, such as a name inside a ring band, and save it with the model.
Engraving puts a text or a logo on a part of your jewelry, for example a name inside a ring band. The engraving follows the curve of the part and is saved with your file. It shows in the Drive viewer, in the embedded viewer, in shared links, in the poster, and in GLB files you export.
Engraving is in beta. You find it in the Engraving tab, the pen icon at the bottom of the left toolbar, in Playground and in the editor.
Engrave a ring band
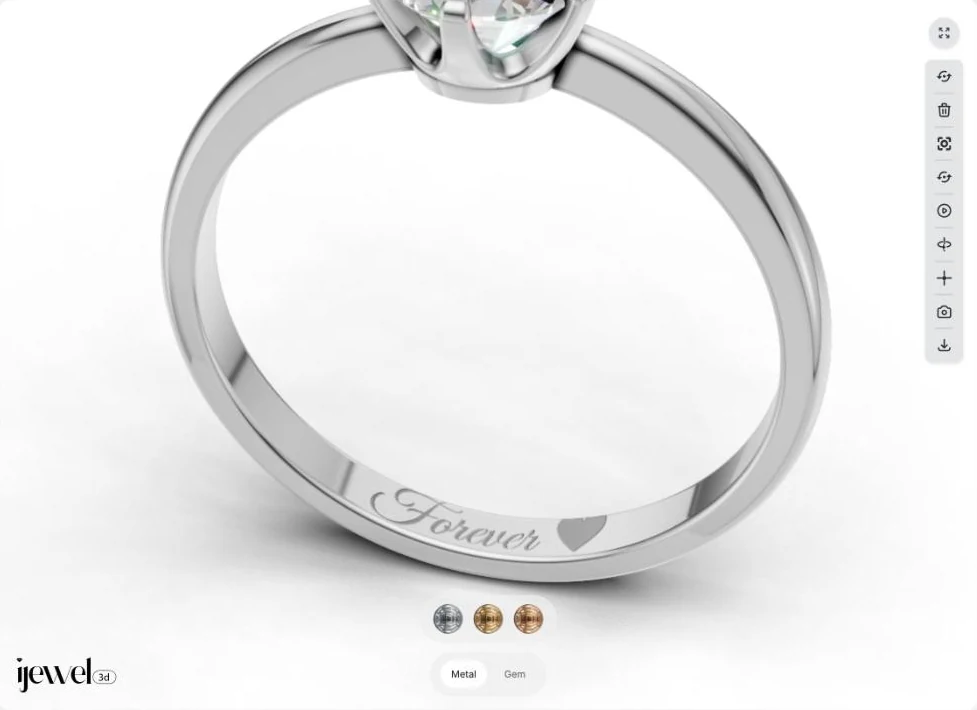
This example puts Forever ♥ inside the band of a solitaire ring.
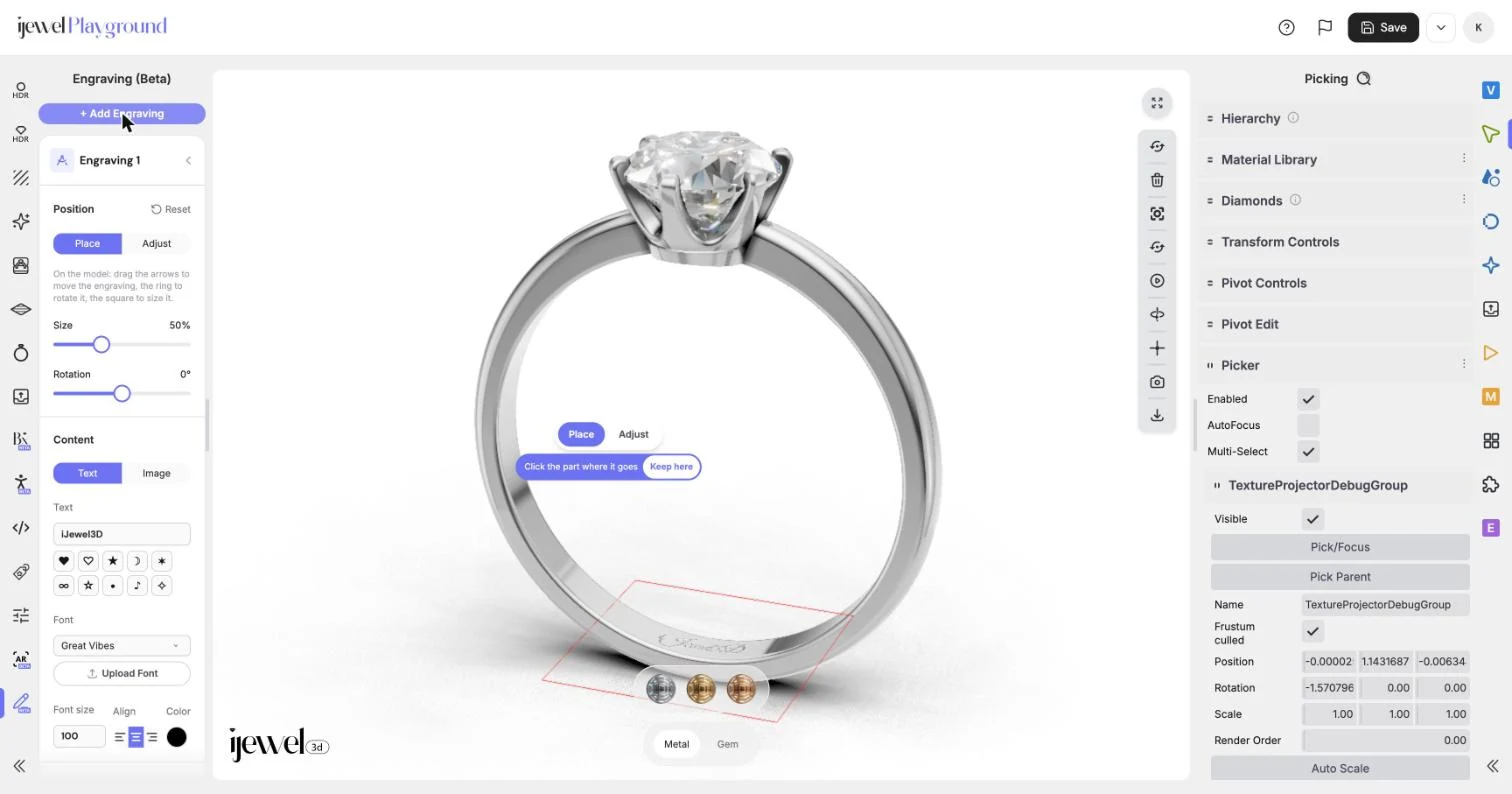
- Open your ring in Playground and click the Engraving tab.
- Click the band in the 3D view. The band gets an orange outline.
- Click + Add Engraving. A card named Engraving 1 opens, and the default text appears on the band.
- The engraving tool starts in Place mode: click the band where the engraving should go. To keep it where it is, click Keep here.
- In the card, type
Foreverin the Text field, then click the ♥ button to add the heart. - Drag the Size slider until the text fills the band nicely.
- Click Save.
All 7 steps are done.
Nothing gets selected when you click?
Click the Picking icon (the arrow) at the top of the right toolbar, then click the part again.
Which parts can be engraved
- Metal parts only. A gem cannot be engraved. Select a metal part instead.
- Up to 2 engravings for each part. When a part has 2, the + Add Engraving button is turned off. Select another part, or delete one of its engravings.
- One part for each engraving. An engraving stays on the part it was added to. To engrave another part, select that part and add a new engraving there.
The text under the + Add Engraving button tells you why it is turned off.
The engraving card
Each engraving has its own card in the Engraving tab: Engraving 1, Engraving 2 and so on. A card has four groups:
| Group | Use it to | Page |
|---|---|---|
| Position | Place, move, rotate and size the engraving | Engraving placement |
| Content | Choose a text or an image | Engraving text and images |
| Finish | Set the depth and the color strength | Engraving text and images |
| Advanced | Show the projector frame and limit how deep it reaches | Engraving placement |
To work on an engraving that is already on the model, click it, or its round marker, in the 3D view. Its card opens. The markers show only while the Engraving tab is open.
Delete an engraving
Click Delete engraving at the bottom of its card. Then click Save to keep the change.
Save and share
Click Save in Playground or in the editor. After that, the engraving shows:
- when you open the file again in Playground or the editor,
- in the Drive viewer, in the embedded viewer and in shared links,
- in the poster (Update Poster) and in GLB files you export.
Engravings belong to the model. A scene preset does not carry them to another model, and choosing a scene preset keeps the model's own engravings.
Clean captures
Before you click Update Poster or export an image, turn off Show projector in the card's Advanced group. The projector frame is only a helper, but it shows in captures while it is on.
A file saved from Playground
A Playground save also keeps the engravings inside the model file. If you delete all of them in the editor, they come back when the file opens again. To remove them, delete them in Playground and save there.
For developers
- The Engraving tab shows when the host turns on
editorSettings.showEngraving. The editor needs mini-editor 0.4.46 or newer on WebGI 0.22.2 or newer. - The viewer shows saved engravings from mini-viewer 0.6.34 on WebGI 0.22.2 or newer, with no option. This covers engravings saved in the project and those inside the GLB of a Playground save.
- With the external-WebGI script (
bundle.nowebgi.iife.js), load WebGI 0.22.2 before it. The bundledbundle.iife.jsincludes its engine.
Related pages
- Engraving text and images: text, fonts, symbols, logos and the finish
- Engraving placement: place, move, rotate and size the engraving
- Material configurator: let people switch materials in the viewer