
Export Videos
iJewel Playground allows you to record and export videos of your jewelry models — perfect for product showcases, social media, and e-commerce listings. You can create turntable animations, camera path recordings, and 360° spins.
Turntable Video (Left Menu)
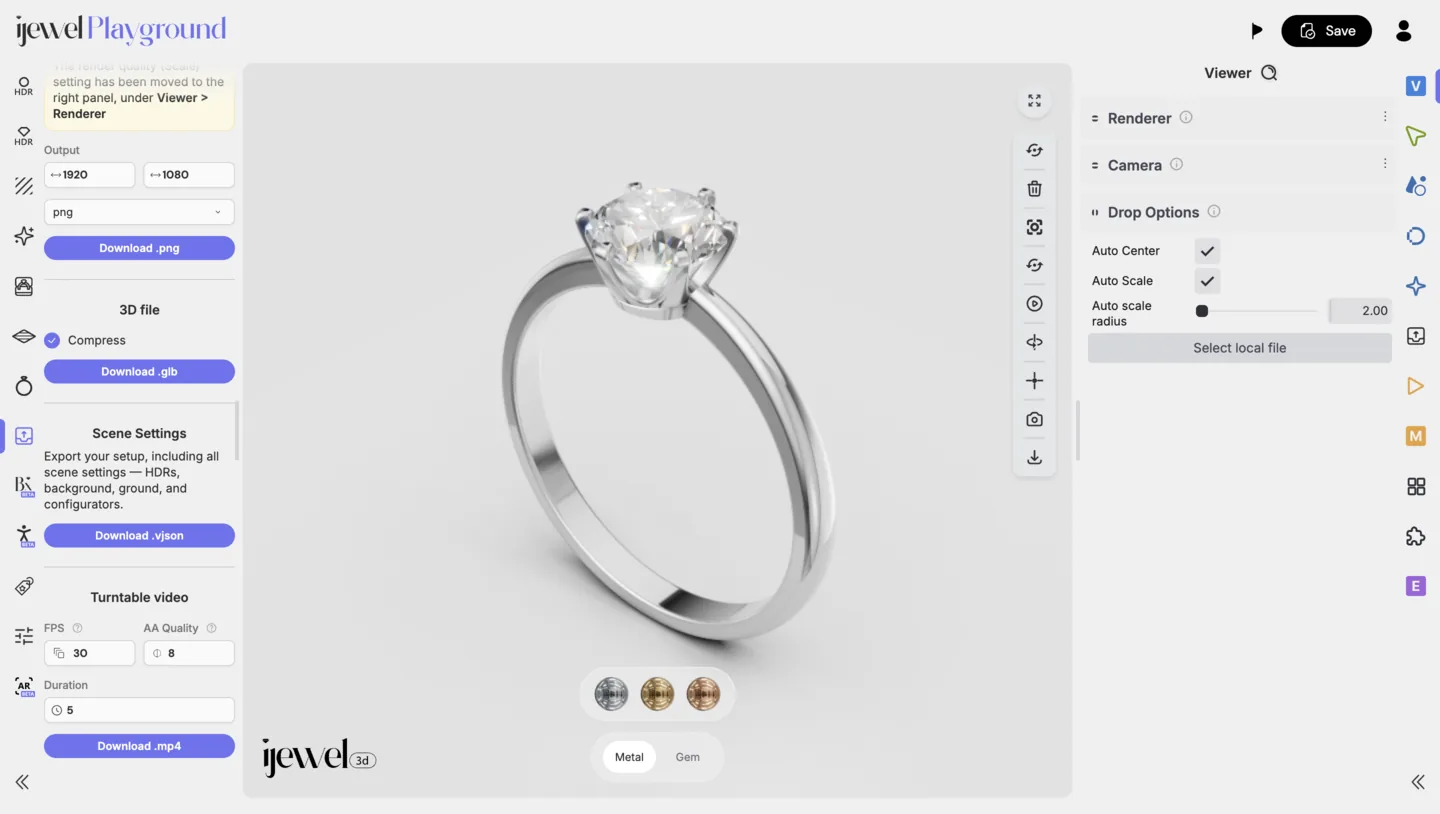
The left-side Presets Panel provides a quick way to export turntable videos.
Steps
- The video uses the canvas size. To change the resolution, use Viewer → Renderer on the right panel.
- Configure the FPS (frames per second) — higher FPS results in smoother playback.
- Set the duration of the video.
- Click Download .mp4.
All 4 steps are done.
The rendering process will begin, indicated by a red border on the canvas.
WARNING
Keep the browser tab open until the rendering process is complete. Closing or switching away from the tab may interrupt the export.
Advanced Recording (Right Panel)
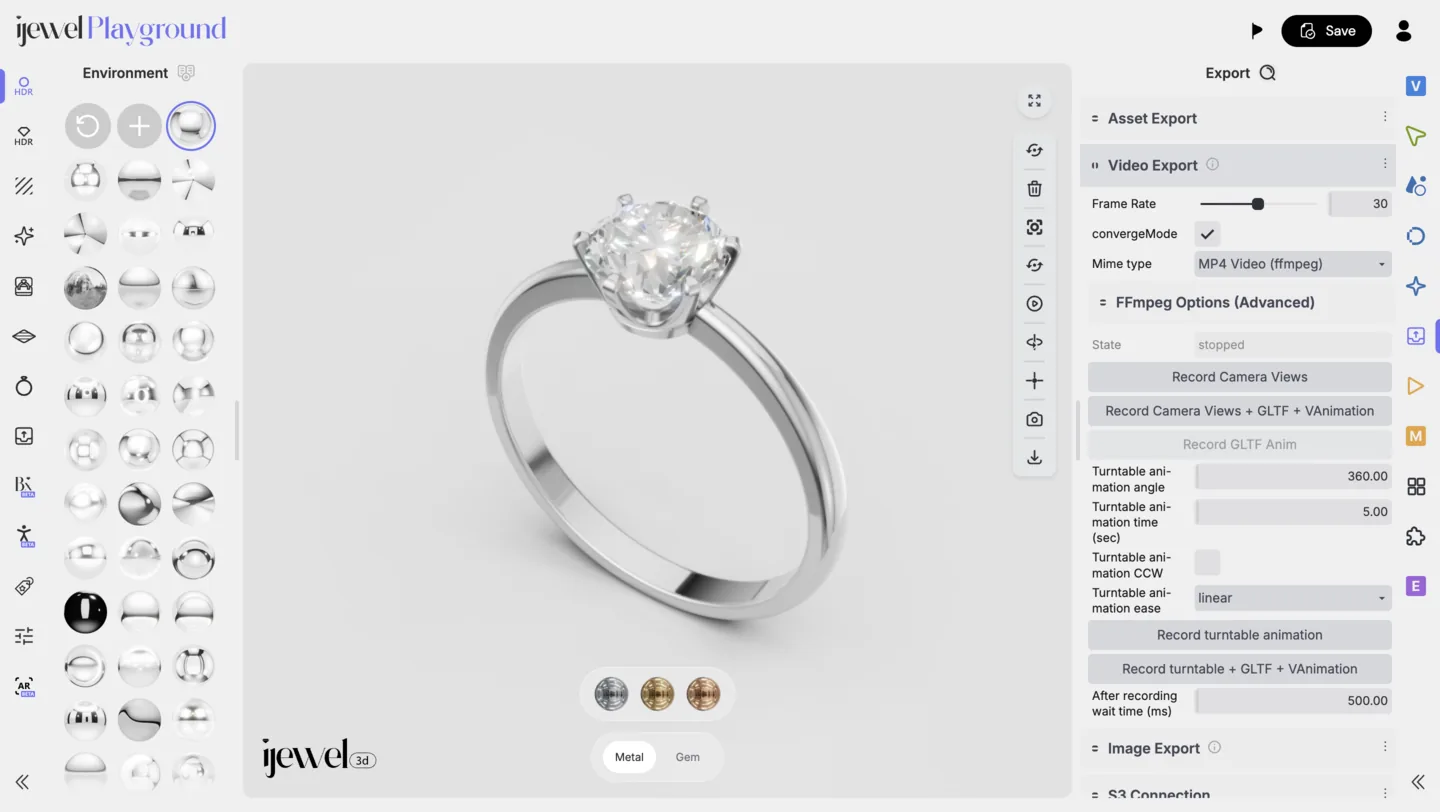
The Video Export section in the Export tab of the right-side Editor UI Panel offers multiple recording modes for different types of video output.
Recording Modes
| Mode | Description |
|---|---|
| Start Recording | Records whatever is happening on the canvas in real time — ideal for custom interactions and walkthroughs. Hidden by default. Uncheck convergeMode (on by default) to show it. |
| Record Camera Views | Records a sequence based on your saved camera view positions. |
| Record turntable animation | Rotates the model for a turntable video. Set Turntable animation angle (360 by default) and Turntable animation time (sec). Check Turntable animation CCW to reverse the direction. |
| Record GLTF Anim | Records the animations stored in the loaded GLB file. |
Steps
- Open the Export tab in the Editor UI Panel.
- Customize your settings:
- Resolution — Set in Viewer → Renderer; the video uses the canvas size.
- Frame Rate — Frames per second (24 or 30 recommended for smooth playback).
- Duration — For a turntable, Turntable animation time (sec).
- Click the button of your desired recording mode.
- Wait for the recording to finish — a red indicator will appear on the canvas during the process.
All 4 steps are done.
TIP
For e-commerce and social media, a 360° animation at 5–10 seconds duration with 30 FPS is a great starting point. It gives customers a complete view of the product in a short, engaging clip.
Video file too large?
See Reducing the Video File Size below - a few settings can shrink a 33 MB export to under 1 MB.
Recommended Settings by Use Case
| Use Case | Mode | FPS | Duration |
|---|---|---|---|
| Product listing | Record turntable animation | 30 | 5–8 sec |
| Social media reel | Record turntable animation | 30 | 5–15 sec |
| Client presentation | Record Camera Views | 24–30 | 10–20 sec |
| Custom walkthrough | Start Recording | 30 | As needed |
Recipes for Common Video Styles
Playground records what the viewer shows. For a video with moving parts or a moving camera, make the animation in your 3D software first.
| Video style | How to make it |
|---|---|
| Turntable | Use Turntable Video |
| Camera that moves around or into the piece | Animate the camera in Blender, bake the keyframes, and export a GLB with cameras. In Playground, go to Scene → Cameras (Loaded), select the camera, and click Activate Main. Then record with Advanced Recording |
| Parts that move, for example a box that opens or stones that move into a setting | Animate the objects in Blender or a different 3D tool and export a GLB with the animation. Play it in GLTF Animations and record |
| Change of background color or rotation of the environment | Use Viewer Animations |
| Glow, light sweep or text | Add these in a video editor after the export |
Stages are not part of an exported GLB
A ring box or a display from Stages loads as a separate item. It is not in the GLB that you export from Playground.
Reducing the Video File Size
Is your exported video too large? The compression settings are located on the right panel, inside the  Export tab: set Mime type to MP4 Video (ffmpeg) and expand FFmpeg Options (Advanced) - highlighted below.
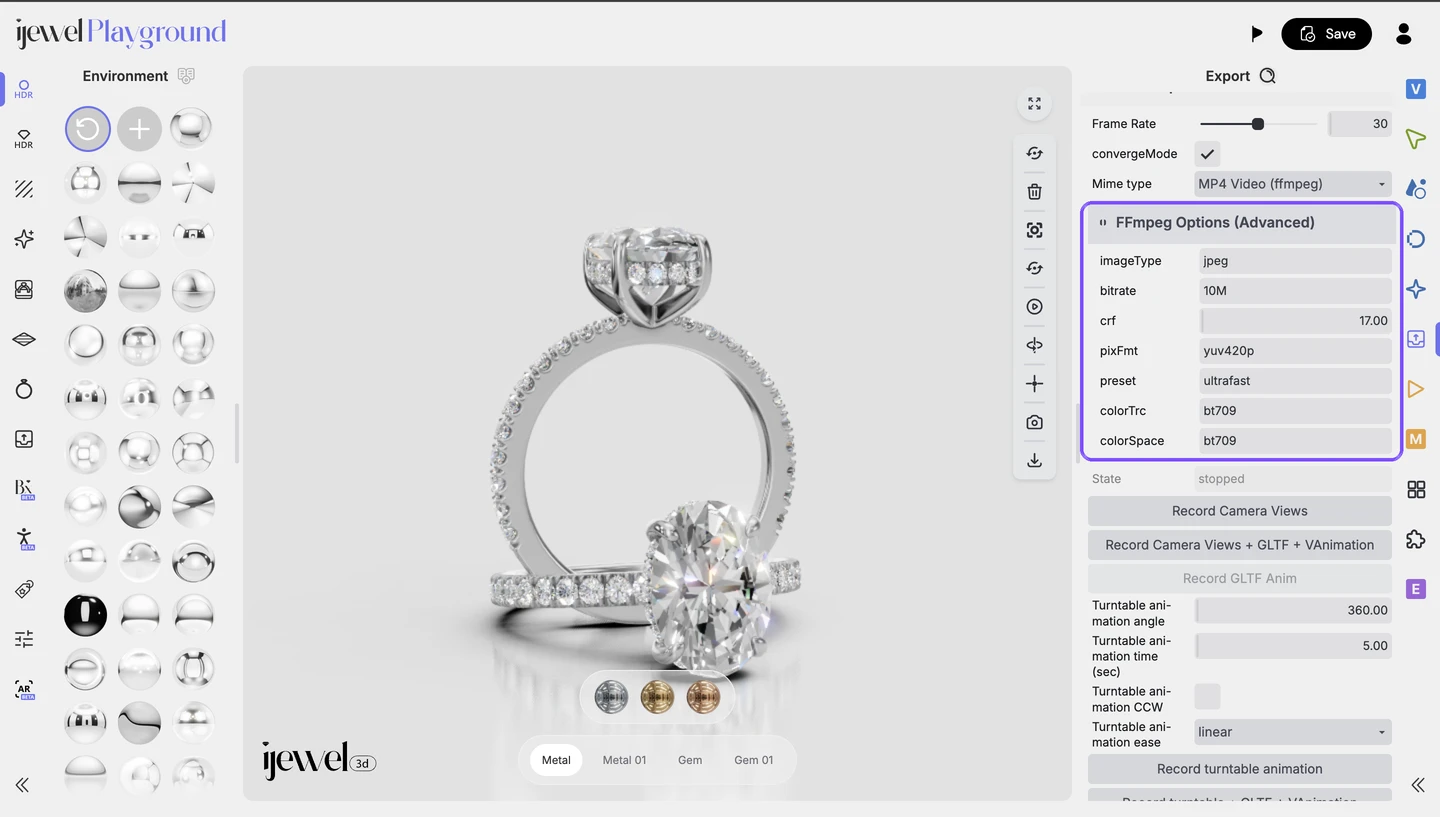
The two settings that matter for file size are crf and preset. Raise the crf (higher = smaller file) and set the preset to veryfast - this alone can shrink a 30+ MB export to a fraction of its size.
Pick your goal:
| Goal | Settings | Approx. size (10-sec video) |
|---|---|---|
| Best quality (larger file) | crf 18, preset veryfast | ~4.5 MB |
| Balanced (recommended for web) | crf 23, preset veryfast | ~2 MB |
| Smallest file | crf 28, preset veryfast | ~1 MB |
Exact sizes vary with the scene, the resolution, and the duration. If the file is still too large, raise the crf up to 28 (Playground uses 28 for any higher value) and lower the export resolution.
What each option does:
| Option | What it does |
|---|---|
| imageType | The format of the frames captured from the canvas before they are encoded into the video (jpeg, png, or webp). |
| bitrate | A fixed target for the amount of data per second of video. When active, it makes the output size predictable. |
| crf | Constant Rate Factor, the quality control. Lower values give better quality, higher values give stronger compression. Playground uses 1–28 (default 17). |
| pixFmt | The pixel format of the encoded video. yuv420p is compatible with all common browsers and players. |
| preset | The encoding speed vs. compression trade-off. Faster presets encode quicker but compress less thoroughly. |
| colorTrc / colorSpace | Color metadata written into the video, so the exported colors match what you see in the viewer. |
Every scene is different, so feel free to play around: export a short test clip, check the size and quality, and adjust the crf up or down until you are happy with the result.